As you will see I have added a new page entitled "Groups". This provides information on the sewing groups I am running.
Roll on January when they start...........
Saturday, 2 November 2013
Tuesday, 10 September 2013
Scrappy Happy
This quilt method was taken from Bonnie K Hunter, Quiltville blog tutorial called "Scrappy Trip Round The World". It comes out at lap size and uses up your scraps. Of course you can just keep adding to it to make it bigger. A quick and easy make. To find the tutorial go to: http://quiltville.blogspot.com

Friday, 6 September 2013
To make the Digital Hearts quilt is easy. Out of assorted red fabrics cut 70 x 5" squares or use charm packs. For the background cut 170 x 5" squares of assorted light to medium fabrics.
Lay the red squares out in a heart shape as in my quilt. Then lay the assorted background colours. When you are satisfied with how it looks, take a photo for reference. I used a 1/4" seam throughout and I assembled the whole quilt in blocks of 9 ensuring the seams were pressed so I could butt them.
Once the top is together, layer with batting and backing. Either tack together or use safety pins and quilt as desired.
For the binding I made it using the scraps.
Good luck.
Digital hearts
I have been practising on my quilting machine so decided to make an easy quilt to practise on. What do you think? 
Friday, 2 August 2013
Diamonds
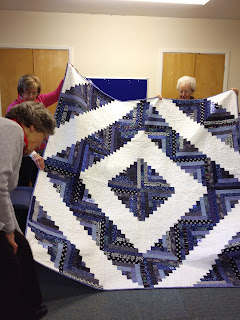
Well I have been busy since last year, changing jobs twice and I am now working four days a week. Lately I have been away a lot in our new caravan but I have tried to keep up with my sewing. This was a log cabin quilt I made for my mum and dad for their Diamond wedding - it was a pleasure to make.

I have been looking at Lily's quilts and her Fresh sewing day so I am going to give it a go! Wish me luck.
Monday, 7 May 2012
Stitchshed1's photostream


Stitchshed1's photostream on Flickr.
Bear with me, I'm just testing the water using Flickr!
Sunday, 6 May 2012
Sashing and Borders
I have had a request to talk about sashing and borders.
Sashing is the term used for the strips of co-ordinating fabric seperating blocks. Imagine you have constructed 9 blocks and they are nicely squared up to 12 ½”. Lay them out in the order you find attractive.
Borders is the term used for the strips of fabric bordering or framing the quilt. These can either be plain or made up of smaller blocks. To make sure the borders fit, measure the width of the quilt through the centre. For the purpose of this exercise it should measure the same as the last measurement for the sashing i.e. 41¾”. Borders are normally a little wider than the sashing. This is because when quilting, the borders will be quilted a little denser than the rest of the quilt, therefore creating weight around the edges of the quilt. Make sure you have squared up your quilt before adding the borders.
Linda
Happy quiltin'
Sashing is the term used for the strips of co-ordinating fabric seperating blocks. Imagine you have constructed 9 blocks and they are nicely squared up to 12 ½”. Lay them out in the order you find attractive.
- Cut 2 strips of fabric 3" wide by 37 ½” long then divide into 3 equal 12 ½” x 3" = 6 sashing strips.
- Lay the sashing inbetween each block in rows 1 to 3. Join using ¼” seams. Press well.
- Cut 2 strips 3 " x 41 ¾”. Lay one strip in between row 1 and 2 and the other inbetween rows 2 and 3. Join using ¼” seams. Press well.
Borders is the term used for the strips of fabric bordering or framing the quilt. These can either be plain or made up of smaller blocks. To make sure the borders fit, measure the width of the quilt through the centre. For the purpose of this exercise it should measure the same as the last measurement for the sashing i.e. 41¾”. Borders are normally a little wider than the sashing. This is because when quilting, the borders will be quilted a little denser than the rest of the quilt, therefore creating weight around the edges of the quilt. Make sure you have squared up your quilt before adding the borders.
- Cut 2 strips of fabric (normally the same as the sashing) 4" x 41¾” and attach one to the top and one to the bottom of the quilt, easing the quilt into each border. Press seam towards the outside edge.
- Measure the quilt from the top to the bottom but through the centre of the quilt, not the edge (if you measure along the edge, the fabric could have stretched giving a false measurement).
- Cut 2 strips 4" x 48 ½”. Attach one strip to each side, easing the quilt in as you go.
- Press seam to outer edge of quilt.
Linda
Happy quiltin'
Subscribe to:
Posts (Atom)